


Table of Contents
- What You'll Achieve and What You Need Before You Start
- Step 1: Confirm It's Drift and Not a Game Setting Like Tilt Steering
- Step 2: Update Your Switch 2 System Software and Controller Firmware
- Step 3: Run the Built-In Stick Test to Measure the Drift
- Step 4: Recalibrate the Analog Stick From the Controller Menu
- Step 5: Clean Around the Stick Base With Compressed Air and Isopropyl Alcohol
- Step 6: Reconnect and Re-Pair the Joy-Con 2 to Rule Out a Connection Fault
- Step 7: Check Your Warranty and Book a Nintendo Repair
- Step 8: Fit GuliKit TMR Drop-In Sticks for a Drift-Free Replacement
- The TMR Swap, Step by Step
- Step 9: Reassemble, Recalibrate and Verify the New Stick Holds Centre
- Common Problems and Fixes
- When to Stop Repairing and Switch to a Third-Party Controller
- Limitations of These Fixes and What This Guide Cannot Promise
- Frequently Asked Questions
- Conclusion
- References
- Related Reading
How to Fix Joy-Con 2 Stick Drift on Your Switch 2 in short: recalibrate the stick in System Settings > Controllers and Sensors > Calibrate Control Sticks, update controller firmware, then clean around the stick base with 90%+ isopropyl alcohol. Those steps clear the conductive carbon dust behind most early drift. If the drift returns, the potentiometer itself is worn and software cannot repair it. Nintendo replaces an out-of-warranty Joy-Con 2 for roughly €24, while a GuliKit TMR drop-in kit costs about $29.99 and needs no soldering. TMR, not Hall effect, is the correct permanent upgrade, because the Switch 2’s attachment magnets interfere with Hall sensors.
By the end of this guide you will have a Joy-Con 2 stick that holds centre again, fixed in under an hour using the cheapest method that actually matches your symptom — which is the whole point of learning How to Fix Joy-Con 2 Stick Drift on Your Switch 2 rather than guessing at it. Nintendo rebuilt the controllers from the ground up for the June 2025 launch, but the iFixit Switch 2 teardown confirmed the Joy-Con 2 still rides on carbon-track potentiometers, which means drift is delayed rather than defeated. You need the Switch 2 charged or docked, compressed air, 90%+ isopropyl alcohol, cotton swabs, and for the hardware route a Tri-Wing Y00 driver, a Phillips #1 driver and a GuliKit TMR kit. Work in order: free software fixes first, warranty second, DIY swap last. One caveat up front — iFixit confirmed the potentiometers; the magnet-interference explanation for skipping Hall effect is expert deduction, not a Nintendo statement.
About this guide: Written by the TrueOrGame hardware desk, based on the console’s own System Settings menus as they appear on Switch 2 in November 2026, iFixit’s teardown and repair documentation, and published 2026 repair pricing from named shops. Where a claim is deduction rather than confirmation, this guide says so.
TrueOrGame – Video Game News, Leaks, Reviews & Guides
Transparency: TrueOrGame received no product, payment or review unit from Nintendo, GuliKit, FIXNOW or The Repair Works in connection with this article. Prices are the shops’ own published figures as of November 2026 and are quoted in their original currencies.
What You’ll Achieve and What You Need Before You Start
How to Fix Joy-Con 2 Stick Drift on Your Switch 2 breaks into nine steps, and the first seven cost nothing, because they only touch software, firmware and surface contamination. The outcome is a measurable one: a marker that sits dead centre in the console’s own stick test with the controller resting on a table, and a game that stops steering itself.
The decision logic matters more than the tool list. Because worn carbon tracks shed conductive dust, and because that dust bridges contacts the console reads as genuine movement, cleaning and recalibration restore a true centre on early-stage drift. Therefore you should exhaust the free steps before opening a controller and ending your warranty cover — a sequence the Federal Trade Commission consumer guidance on warranties makes worth taking seriously, since self-repair decisions sit with you once the screws come out.
What you need before you start
- A Switch 2 on the latest system software, charged or docked
- The affected Joy-Con 2 and a second controller for comparison testing
- Compressed air with a precision nozzle
- 90%+ isopropyl alcohol and cotton swabs
- Tri-Wing Y00 screwdriver and Phillips #1 screwdriver (hardware route only)
- A GuliKit TMR drop-in stick for Joy-Con 2, around $29.99
- A magnetic parts tray or taped paper for the screws and ribbon connector
Step 1: Confirm It’s Drift and Not a Game Setting Like Tilt Steering
Real drift moves the cursor on the Switch 2 Home menu and inside System Settings with the controller resting flat on a table, because the OS reads raw stick values and applies no game-specific dead zone. If the cursor stays put there, your hardware is fine and the problem lives in a game.
The false positives are specific and common. Tilt steering in Mario Kart World, gyro-based camera options and motion aiming in shooters all generate phantom movement that disappears the instant you switch the option off, which means the controller is innocent. Add a clean boot before you conclude anything: hold the power button, choose Power Options and Turn Off rather than Sleep Mode, because a stale Bluetooth session can mimic drift until the link is re-established.
Four checks that separate drift from a setting
- Rest the Joy-Con 2 flat on a table and watch the Home menu cursor for 30 seconds
- Turn off motion or tilt controls in the game that showed the problem, then retest
- Detach the Joy-Con 2 and test it wirelessly, then reattach and test it docked to the console
- Fully power off the Switch 2 rather than sleeping it, restart, and retest on the Home menu
Step 2: Update Your Switch 2 System Software and Controller Firmware
Go to System Settings > System > System Update, then System Settings > Controllers and Sensors > Update Controllers, because Nintendo ships stick dead-zone and input-filter changes inside controller firmware rather than game patches. Both updates take a couple of minutes and neither touches your save data.
The cause-and-effect here is straightforward: firmware sets the dead zone the console applies to raw stick values, therefore a firmware regression produces drift on a mechanically healthy stick, and a firmware fix removes it with no repair at all. That is why this step sits ahead of every physical intervention.
One practical detail: attach the Joy-Con 2 to the console before running Update Controllers. The update pushes faster and more reliably over the rail contacts than over the wireless link, which matters if the controller is already dropping packets.
Step 3: Run the Built-In Stick Test to Measure the Drift
Open System Settings > Controllers and Sensors > Test Input Devices > Test Control Sticks, rest the controller on a flat surface, and note how far the on-screen marker sits from centre and in which direction. That reading is your baseline, and without it you cannot tell whether the later steps worked or whether you simply stopped noticing.
The measurement decides your route. A marker sitting a hair off centre on a single axis indicates early carbon-track wear, which responds to cleaning and recalibration. A marker parked at the edge of the ring means the wiper has lost contact with the resistive track, which means hardware replacement is the only fix and Steps 4 to 6 will waste your evening.
Photograph the screen or write down the offset and the axis, because that single data point determines whether Step 4 through Step 6 are worth attempting or whether you should skip straight to Step 7.
Step 4: Recalibrate the Analog Stick From the Controller Menu
Most readers searching How to Fix Joy-Con 2 Stick Drift on Your Switch 2 stop here, because recalibration rewrites the stored centre value and cancels a small, consistent offset immediately. It is free, reversible and takes under a minute.
Be honest about the limitation. Calibration moves the software’s idea of centre; it does not repair the resistive track. Therefore drift that returns within days or weeks confirms mechanical wear rather than a bad calibration, and repeating this step a fourth time will not change the result.
Recalibrating the Joy-Con 2 control stick
- Open System Settings > Controllers and Sensors
- Select Calibrate Control Sticks and press down on the affected stick
- Choose Calibrate when prompted and release the stick so it rests at its natural centre
- Rotate the stick through a full circle to its outer limit three times, then release
- Confirm the calibration, return to Test Control Sticks and verify the marker now sits at centre
- Retest in the game where the drift appeared, with motion controls still switched off
Step 5: Clean Around the Stick Base With Compressed Air and Isopropyl Alcohol
Push the stick to one side, fire two or three short bursts of compressed air into the exposed gap at the base, then dampen a cotton swab with 90%+ isopropyl alcohol and work it around the rubber skirt while rotating the stick through its full range. That is the entire procedure, and it requires no tools and no disassembly.
The mechanism explains why it works. Friction between the metal wiper and the carbon track sheds conductive dust, and that dust bridges contacts to produce movement the console reads as a genuine input. Flushing it out removes the cause rather than masking it, which is why cleaning frequently outperforms repeated recalibration on intermittent drift.
The constraints are not optional. Use 90% alcohol or higher, because lower concentrations carry too much water; keep the controller powered off throughout; never soak the housing; and let the Joy-Con 2 dry for at least 15 minutes before reconnecting it. Recalibrate afterwards, because the cleaning step shifts the resting position slightly and the old stored centre will no longer match.
Step 6: Reconnect and Re-Pair the Joy-Con 2 to Rule Out a Connection Fault
Go to System Settings > Controllers and Sensors > Disconnect Controllers, hold the sync button on the Joy-Con 2, then attach it to the console rails to re-pair over a wired connection. Rebuilding the link from scratch takes seconds and rules out an entire category of fault.
The cause is radio, not mechanical. A congested 2.4GHz environment or a dirty rail contact produces dropped and repeated input packets, and the console interprets a stale packet as held movement — behaviour identical to drift on screen, but one that clears the moment the link is rebuilt.
The diagnostic is clean: if the stick behaves perfectly while attached to the console and drifts only when detached, the fault is the wireless link or the rail contacts, not the potentiometer. Wipe the rail contacts with a dry swab before you blame the stick.
Step 7: Check Your Warranty and Book a Nintendo Repair
Open Nintendo’s regional support site, start a repair request for the Joy-Con 2 rather than the console, and state “control stick drift” explicitly, because Nintendo continues to handle stick drift claims free of charge in North America and parts of Europe regardless of visible wear.
The out-of-warranty numbers are modest by current hardware standards. Nintendo’s own pricing puts a Joy-Con 2 replacement at roughly €24, up from €17.30 for an original Switch Joy-Con, driven by the more complex magnetic attachment assembly inside the newer unit.
The trade-off deserves a decisive reading: Nintendo fits another potentiometer stick, which means the repair restores the controller but resets the same wear clock. A third-party TMR upgrade costs more up front and removes the failure mechanism instead of rewinding it. Note the one-way door as well — opening the Joy-Con 2 yourself ends warranty cover, therefore check your purchase date and your statutory consumer rights before you reach for a screwdriver.
| Option | Cost (2026) | Stick fitted | Warranty kept? |
|---|---|---|---|
| Nintendo in-warranty drift repair | Free (North America, parts of Europe) | Potentiometer | Yes |
| Nintendo out-of-warranty Joy-Con 2 replacement | ~€24 | Potentiometer | Not stated |
| FIXNOW potentiometer replacement | €49 | Potentiometer | No |
| FIXNOW TMR upgrade | €59 | TMR | No |
| The Repair Works TMR upgrade, one Joy-Con 2 | £45 | TMR | No |
| The Repair Works TMR upgrade, both Joy-Con 2 | £79 | TMR | No |
| DIY GuliKit TMR drop-in kit | ~$29.99 | TMR | No |
Step 8: Fit GuliKit TMR Drop-In Sticks for a Drift-Free Replacement
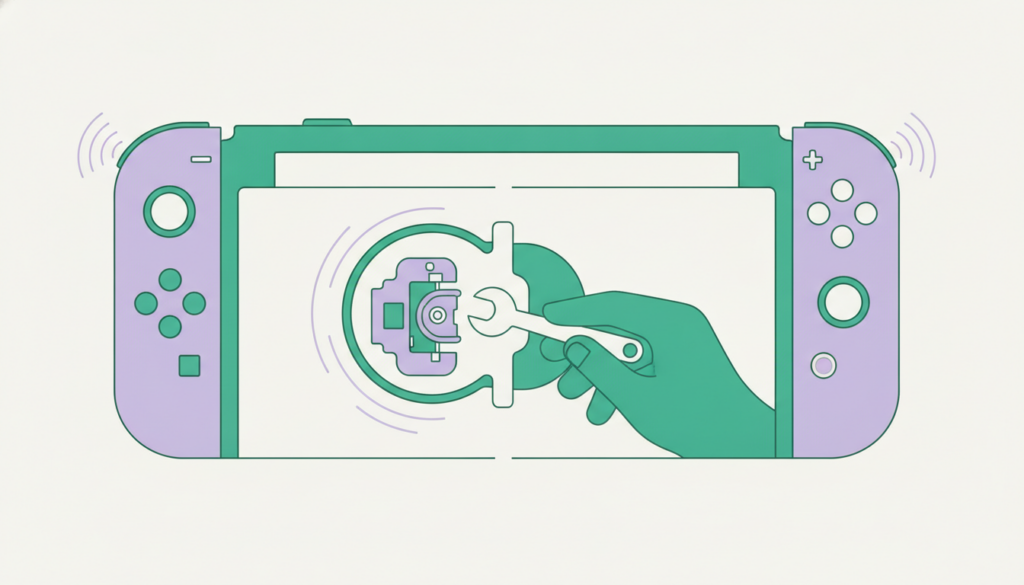
The permanent answer to How to Fix Joy-Con 2 Stick Drift on Your Switch 2 is a sensor swap, because no amount of calibration restores a carbon track that has already worn through.
State the hardware rule bluntly: do not buy Hall effect sticks for a Joy-Con 2. The Switch 2 attaches its controllers with powerful magnets, and Hall effect sensors read stick position from magnetic fields, therefore those attachment magnets swamp the sensor and produce behaviour worse than the drift you set out to cure. TMR — tunnelling magnetoresistance — sticks are also magnetic but reject external fields, which is why the 2026 repair trade standardised on them. Both are established magnetic sensing technologies with published engineering standards behind them through bodies such as the IEEE Standards Association, unlike the vaguer marketing labels printed on some replacement kits.
Set expectations on difficulty honestly. The GuliKit kit sells for around $29.99, ships with the Tri-Wing Y00 and Phillips #1 drivers, and requires no soldering, which means the real risk is the ribbon cable rather than the electronics. iFixit’s Switch 2 Joy-Con repair documentation is worth reading alongside the kit instructions for screw layout and connector handling.
The TMR Swap, Step by Step
Work on a clear, well-lit surface and keep the screws in the order you removed them, because the rear-shell Tri-Wing screws are not all the same length and forcing a long screw into a short boss cracks the plastic. Disconnect the battery ribbon before you touch anything else, as that removes the short-circuit risk entirely. The single most damaging mistake in this repair is pulling the stick ribbon out while its retaining flap is still closed — the flap lifts first, every time, and the cable then slides free with no resistance at all.
Fitting a TMR stick in a Joy-Con 2
- Power off the Switch 2 and detach the affected Joy-Con 2
- Remove the rear-shell Tri-Wing Y00 screws and keep them in order on tape
- Lift the rear shell slowly and disconnect the battery ribbon first
- Release the stick ribbon connector by lifting its retaining flap, never by pulling the cable
- Unscrew the Phillips #1 screws holding the stick module and lift the old potentiometer unit out
- Seat the GuliKit TMR module, reinsert its ribbon fully square, and close the retaining flap
- Refit the stick screws, reconnect the battery ribbon, then close the shell
| Sensor type | Wear-based drift | Affected by Switch 2 magnets? | Recommended for Joy-Con 2? |
|---|---|---|---|
| Carbon-track potentiometer (Nintendo stock) | Yes, from track wear | No | Only as a like-for-like repair |
| Hall effect | No | Yes, severe interference | No |
| TMR (tunnelling magnetoresistance) | No | No, rejects external fields | Yes |
Step 9: Reassemble, Recalibrate and Verify the New Stick Holds Centre
Refit every Tri-Wing screw, attach the Joy-Con 2 to the console, run Calibrate Control Sticks, then open Test Control Sticks and confirm the marker sits dead centre at rest and returns to centre cleanly from all eight directions.
Calibration is mandatory after a swap, not optional. A TMR module has its own electrical centre and range, therefore the console’s stored calibration from the old potentiometer reads as a permanent offset until you overwrite it — which is why a brand-new stick sometimes appears to drift worse than the part it replaced.
Then apply a real verification standard rather than a menu glance. Play 30 minutes of something demanding fine stick control — a precision platformer, or a shooter with aim sensitivity pushed high — because a marginally seated ribbon shows up under sustained input and thermal change rather than in a ten-second test screen.
Common Problems and Fixes
Each of these symptoms points at a different cause, which means the correct fix is determined by the pattern rather than by cycling through every step again in order.
Four common failures and what to do
- Drift returns days after calibration: the carbon track is worn through, so calibration can no longer hold a centre value. Go to Step 7 or Step 8.
- Only one axis drifts: one potentiometer wiper has failed while the other stays healthy, which still requires a full module replacement because both axes share the unit.
- Stick ignores small inputs after a fix: the dead zone was widened by an over-aggressive calibration, so recalibrate and release the stick without touching it before confirming.
- Teardown made it worse: a creased or part-seated stick ribbon produces dropouts and input spikes. Reopen, reseat the ribbon fully square, and close the retaining flap.
- Torn ribbon connector flap: stop. A broken flap means no reliable contact, therefore the Joy-Con 2 needs a professional board-level repair or replacement.
When to Stop Repairing and Switch to a Third-Party Controller
Stop repairing when a single Joy-Con 2 has already had two stick replacements, when the rail contacts or shoulder buttons are also failing, or when the quoted repair exceeds the roughly €24 Nintendo charges for a replacement unit.
The economics are not complicated. A £45 single-stick TMR upgrade, or £79 for a pair, is rational on a controller whose shell, battery and rails are sound, because the repair preserves the value sitting in the rest of the unit. On a controller with several faults, that money goes further on a pro-style pad shipped with TMR or Hall effect sticks from the factory — a route worth planning alongside the rest of your gaming setup guides if most of your play is docked.
Multiplayer Games Archives – TrueOrGame
Note the trade-off plainly: a third-party pad loses detached dual-controller play and the Joy-Con 2 mouse mode, therefore most owners keep one working pair for handheld and local multiplayer and use a third-party pad for docked sessions.
Limitations of These Fixes and What This Guide Cannot Promise
Calibration and cleaning are not cures. They restore a usable centre on a worn stick, therefore drift returning within weeks is the expected outcome on a track that has already degraded, and treating it as a failure of technique misreads the mechanism.
TMR removes the wear mechanism, but it remains a third-party part. There is no long-term independent durability data on Joy-Con 2 TMR modules yet, because the kits only reached retail in early 2026.
The magnet-interference explanation for Nintendo skipping Hall effect is expert deduction from the Switch 2’s attachment design, not a statement from the company. As IGN reported, Tetsuya Sasaki of Nintendo’s Technology Development Division confirmed in April 2025 only that the controllers were redesigned from the ground up, and stayed vague on drift specifically — a distinction that belongs in the same bucket as our verified leaks and rumour tracking.
Repair prices quoted here are specific shops in specific markets as of November 2026 and shift with region, currency and parts supply. Nintendo’s regional repair terms also differ, so free drift cover in North America does not guarantee the same treatment in every territory; check your own rights, including the warranty guidance published by the Federal Trade Commission if you are in the United States.
Finally, be sceptical of the many video “fixes” circulating for this fault. Frameworks like the CRAAP test for evaluating source credibility apply as well to a repair clip as to a research paper, and as publishers such as Oxford Academic note in the context of non-peer-reviewed claims, a single anecdotal report is weak evidence. That is why this guide separates measured console readings from community claims. Alternatives worth weighing: living with a widened in-game dead zone, buying a replacement Joy-Con 2 pair outright, or moving to a pro-style pad with factory TMR sticks.
Frequently Asked Questions
Does the Nintendo Switch 2 Joy-Con 2 still get stick drift?
Yes. The iFixit teardown in June 2025 confirmed the Joy-Con 2 uses carbon-track potentiometers rather than drift-proof sensors, and reports through 2026 confirm drift cases are appearing. The new sticks have tighter tolerances and larger contact pads, therefore they last longer than the 2017 originals, but the wear mechanism is unchanged. Drift is delayed, not defeated.
How do I fix Joy-Con 2 stick drift without opening the controller?
Start with the free steps in How to Fix Joy-Con 2 Stick Drift on Your Switch 2: update controller firmware under Controllers and Sensors, run Calibrate Control Sticks, fully power the console off rather than sleeping it, then clean around the stick base with compressed air and a 90%+ isopropyl swab. These clear conductive carbon dust and reset the stored centre value.
Should I buy Hall effect sticks for my Joy-Con 2?
No. The Switch 2 holds its controllers on with powerful magnets, and Hall effect sensors determine stick position from magnetic fields, so those attachment magnets cause severe interference. Buy TMR (tunnelling magnetoresistance) sticks instead. TMR is magnetic but rejects external fields, which is why third-party repair shops standardised on TMR for Joy-Con 2 work during 2026.
How much does Nintendo charge to fix Joy-Con 2 drift?
Nothing, if the controller is in warranty and you log the fault as control stick drift, because Nintendo continues to cover drift claims in North America and parts of Europe. Out of warranty, Nintendo’s published pricing puts a Joy-Con 2 replacement at roughly €24, up from €17.30 for an original Switch Joy-Con due to the more complex magnetic attachment assembly.
Does replacing the stick myself void the Switch 2 warranty?
Yes. Removing the Tri-Wing screws ends Nintendo’s warranty cover on that Joy-Con 2, therefore check your purchase date and your local statutory consumer rights first. If the unit is still covered, the free official repair is the better route. A GuliKit TMR kit at around $29.99 makes sense once cover has expired.
Why does my Joy-Con 2 drift in one game but not others?
Because that game is almost certainly using motion input rather than reporting a hardware fault. Tilt steering in Mario Kart World and gyro aiming in shooters both produce phantom movement from controller orientation. Switch the motion option off and retest. Real drift shows up on the Switch 2 Home menu with the controller flat on a table.
Is a TMR stick repair worth paying a shop for?
It is worth it on an otherwise healthy controller. FIXNOW charges €59 for a TMR upgrade against €49 for another potentiometer, and The Repair Works charges £45 for one Joy-Con 2 or £79 for both. The extra outlay removes the wear mechanism entirely, which means you are not paying for the same repair again in a year.
How long until a Joy-Con 2 stick starts to drift?
There is no fixed figure, and nobody should claim one. Wear is driven by hours of stick contact and how hard the stick is pushed, so competitive shooter and platformer players reach the threshold far sooner than turn-based players. Reports of Joy-Con 2 drift began surfacing roughly a year into the console’s life after its June 2025 launch.
Conclusion
How to Fix Joy-Con 2 Stick Drift on Your Switch 2 comes down to a fixed order of operations: firmware, calibration, cleaning, re-pair, warranty, then a TMR swap. Run them in that sequence and most readers never reach a screwdriver. The decisive position is this — because the Joy-Con 2 still uses carbon-track potentiometers, every owner who plays heavily will eventually meet this fault, therefore a TMR module is the only fix that stops the clock rather than resetting it. Nintendo’s own repair fits the same technology that wore out in the first place, which makes it the right call inside warranty and a short-term answer outside it. Before you buy anything, check your purchase date: a free in-warranty drift repair beats a $29.99 kit every time. Read more in our latest Nintendo and hardware headlines.
References
- iFixit — Nintendo Switch 2 Teardown (June 2025 hardware teardown)
- iFixit — Nintendo Switch 2 Joy-Con device and repair documentation
- IGN — So, What About Joy-Con Stick Drift on the Nintendo Switch 2? Nintendo Responds (April 2025 reporting)
- FIXNOW — Nintendo Joy-Con 2 Stick Drift Repair pricing
- The Repair Works — Switch 2 Joy-Con Drift Repair pricing
- Federal Trade Commission — consumer protection and warranty guidance
- IEEE Standards Association — standards for magnetic sensing and related technologies
- CASRAI — CRAAP Test: Evaluating Source Credibility